Tuesday, July 2, 2013

Baseboards

The time finally came when the baseboards needed to be refinished.  The boards were all way to long to fit into our vehicles so we had to wait till we could work on them in the basement at the farm.  We carried them all in and discovered in order to fit downstairs the boards had to go in and out via the Butler's Pantry window!

The racks Jason built to hold all of the boards for them to dry in between steps.  We had to strip, denatured alcohol, stain, shellac, and apply a coat of poly to each board.

A view of some of the boards and the workshop


Removing old nails


Jason and Eli working away on the trim


My Dad working on the trim.  He spent many days up here working on the trim in our basement.  He learned every song played on KDWB!

Some of the baseboards in the spare bedroom

Master bedroom


Living room

Up close of the baseboards.  The base round still needed to go on yet.

another view


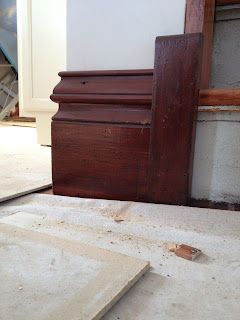
We didn't have enough of the old trim tomake it around all of the new walls.  This is a picture of the stain on the new boards.  The stain looks different, but is mostly used on the 3rd floor so you can't notice it too much.


Finished Kitchen Preview

We've been slightly busy and the blog posts haven't been updated for a very long time.  I'll try and get caught up.

The kitchen cabinets were installed and we had the granite people come out and measure.  After the guy came out and measured he came back with the actual cost which turned out to be significantly different than the original quote.  After some phone calls and visit to other granite stores we ended up paying the extra charge because we were in a time crunch.  What turned out to be a good deal, ended up being a not so good deal, but when you have a deadline you're kind of stuck.

We are very happy with the end result and the granite looks great.


We added the original wainscoting to the back of the peninsula.

My Dad made this rolling island for us.  This was originally the kitchen sink.  He added wheels a back and some trim and painted it black and hand waxed it.  I love how it turned out, he did a great job.


Tuesday, April 9, 2013

The Farm Back in the Day

Here is a picture that we were given from the previous owner.  It was taken about 1950's.


The barn, windmill, corn crib, and building by the garage are no longer standing.

Kitchen Cabinets

After weeks of sitting in the cold wet garage, the kitchen cabinets were brought into the house, unpacked and installed.  We ordered Thomasville brand cabinets from Home Depot.  They look great, unfortunately not everything came correctly.  Home Depot has been great to work with and the issues should be resolved quickly.

The base cabinets

Base cabinets and uppers.  All of the cabinets should be painted, panels for the sides should be coming to us to fix this.

View of the other side of the kitchen, the double oven with go where the hole is.

View of the kitchen

Farmhouse sink


The Old Is New Again

The floors were refinished last week and look amazing!  90 plus years of wear and tear had to be sanded off and luckily underneath all that grime is a beautiful wood floor.  The second floor of the house was painted with a greenish paint and now just have polyurethane on them, and the main floor has been stained and polyurethane put on.
Living room before sanding

Dining room before sanding

Dining room during the sanding process, the sandpaper is on the floor in this picture.  It was some coarse stuff!

New wood patched in with the old floor

The old floor getting ready to have wood laced in

Wood laced in from a different area of the house


Dining room after sanding

Kitchen floor after sanding

Living room after the wood has been laced in to cover the holes and sanded.


Master Bedroom partially sanded

Master Bedroom after sanding


The stair treads getting refinished 

Stairs after sanding

Eli's room during the sanding process


Mackenzie standing in Eli's closet.  The floor sander is also in the picture.


The options for staining for the upstairs floor

Stain options on the main floor

"New" kitchen floor!

New upstairs floor

New stairs

Living room floor
Master Bedroom floor.  The hole in the floor will have the original vent put back in it.  This vent is also where the guy refinishing our floor stepped through and cracked the newly completed and painted ceiling!

Eli's floor

This picture shows the new floor vs the old floor


Messing around with the flooring guys ear protection

Mackenzie's picture of Jason